How to detect Google Suite hosted email address
Published on: 2024-08-10 18:48:28
Email profiling and detection of the email hosting provider help you understand customers. When an email address uses Google Suite, it can mean a paid service or hosting for an academic institution.
It is also possible that an email address is hosted on Google services from the time when “Google Apps for your domain” was offered for free. In that case, it is not a paid premium email service. Publicly available information cannot detect that difference reliably.
Every domain that can receive emails has MX records in its DNS records. For a Google Suite domain, the records point to Google email servers. If the email address is [email protected] and example.com uses GSuite, an MX record could look like this:
{
          "host": "wsj.com",
          "class": "IN",
          "ttl": 1800,
          "type": "MX",
          "pri": 1,
          "target": "aspmx.l.google.com"
    }
Here, we can clearly see the target server address aspmx.l.google.com. This server physically receives all emails sent to addresses ***@example.com.
To access MX record data, we need a service that can query DNS records. For this example, we can use our sample api:
http://sampleapis.Decisimo.net/dns/[email protected]
Now, let us put it all together in Decisimo decision engine
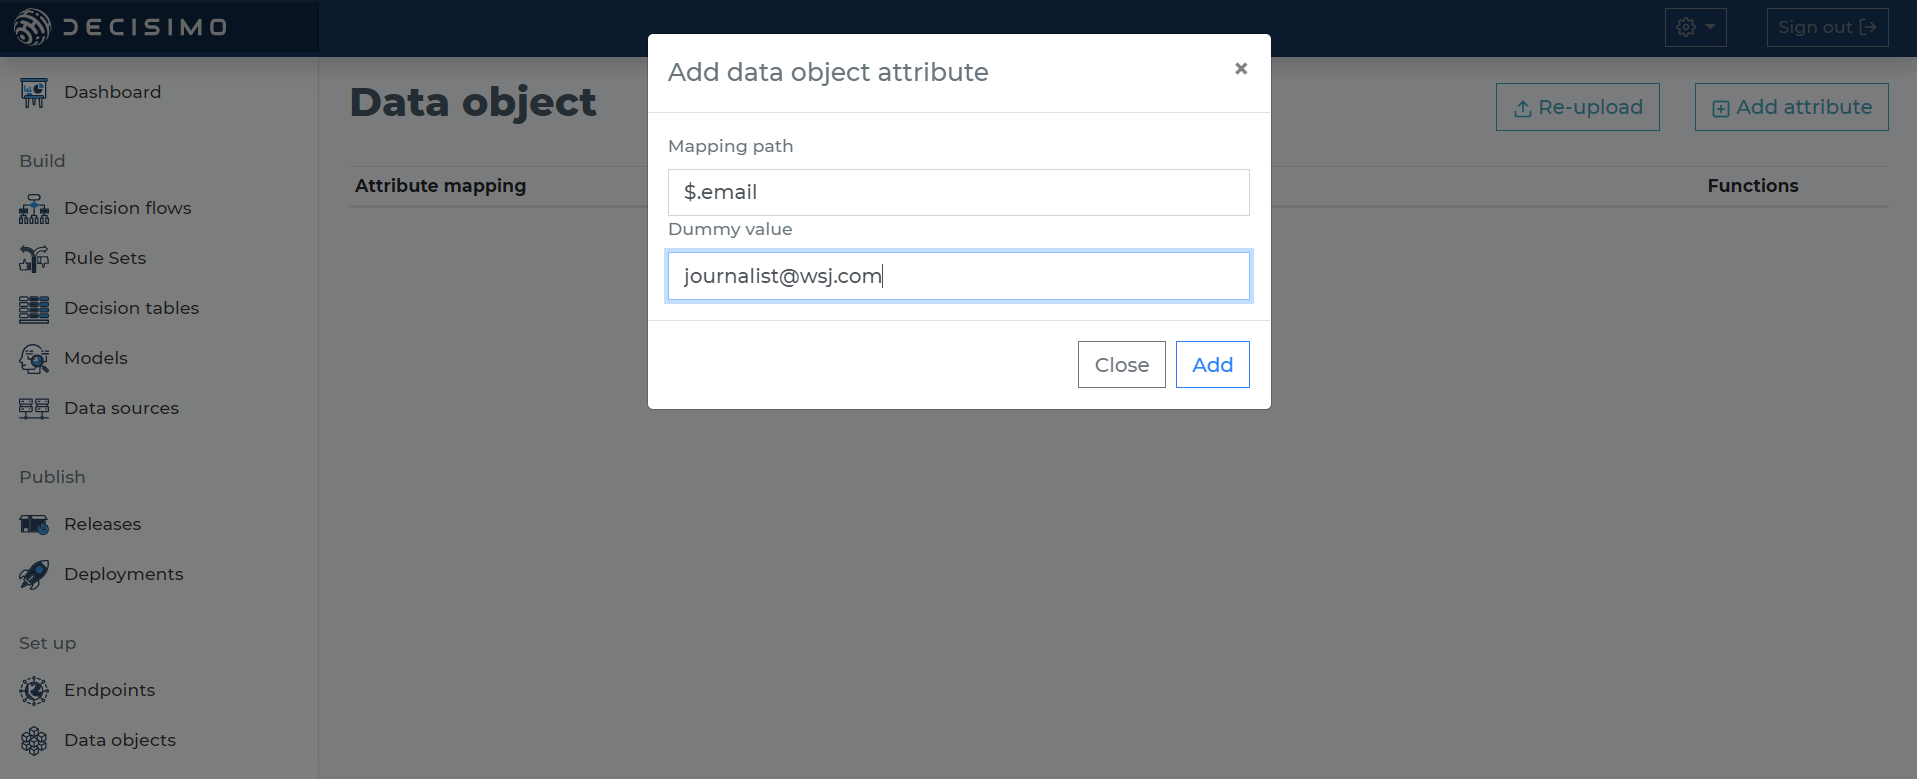
1. Create sample Data object
We want to create a sample data object so we can test our rules quickly. Add the attribute $.email with a dummy value [email protected] (they run on GSuite).

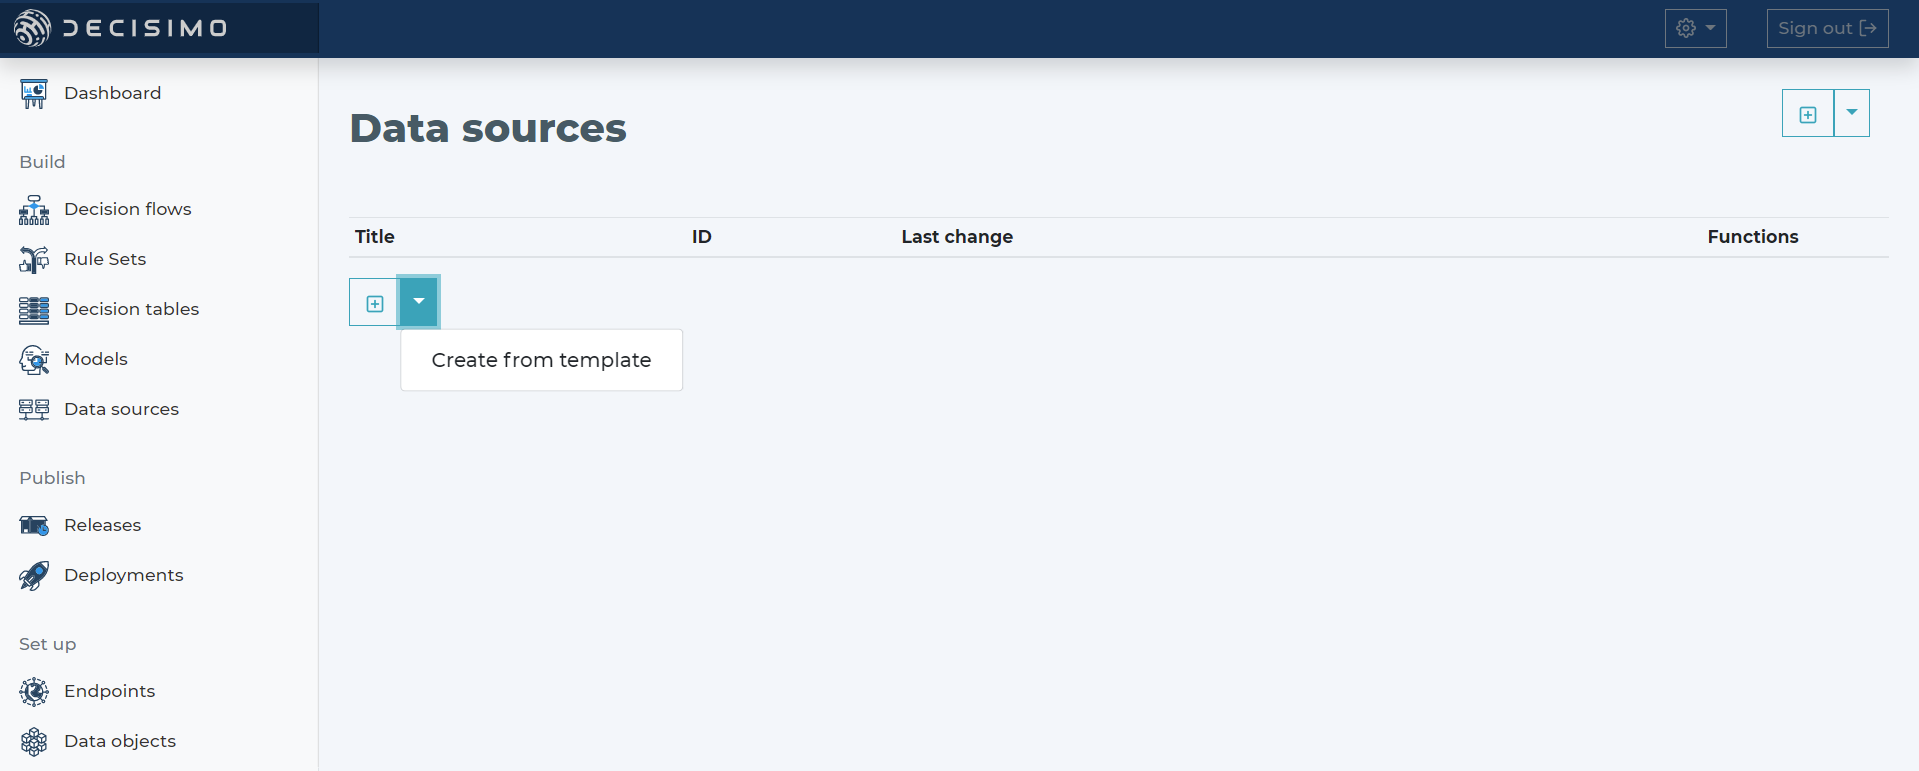
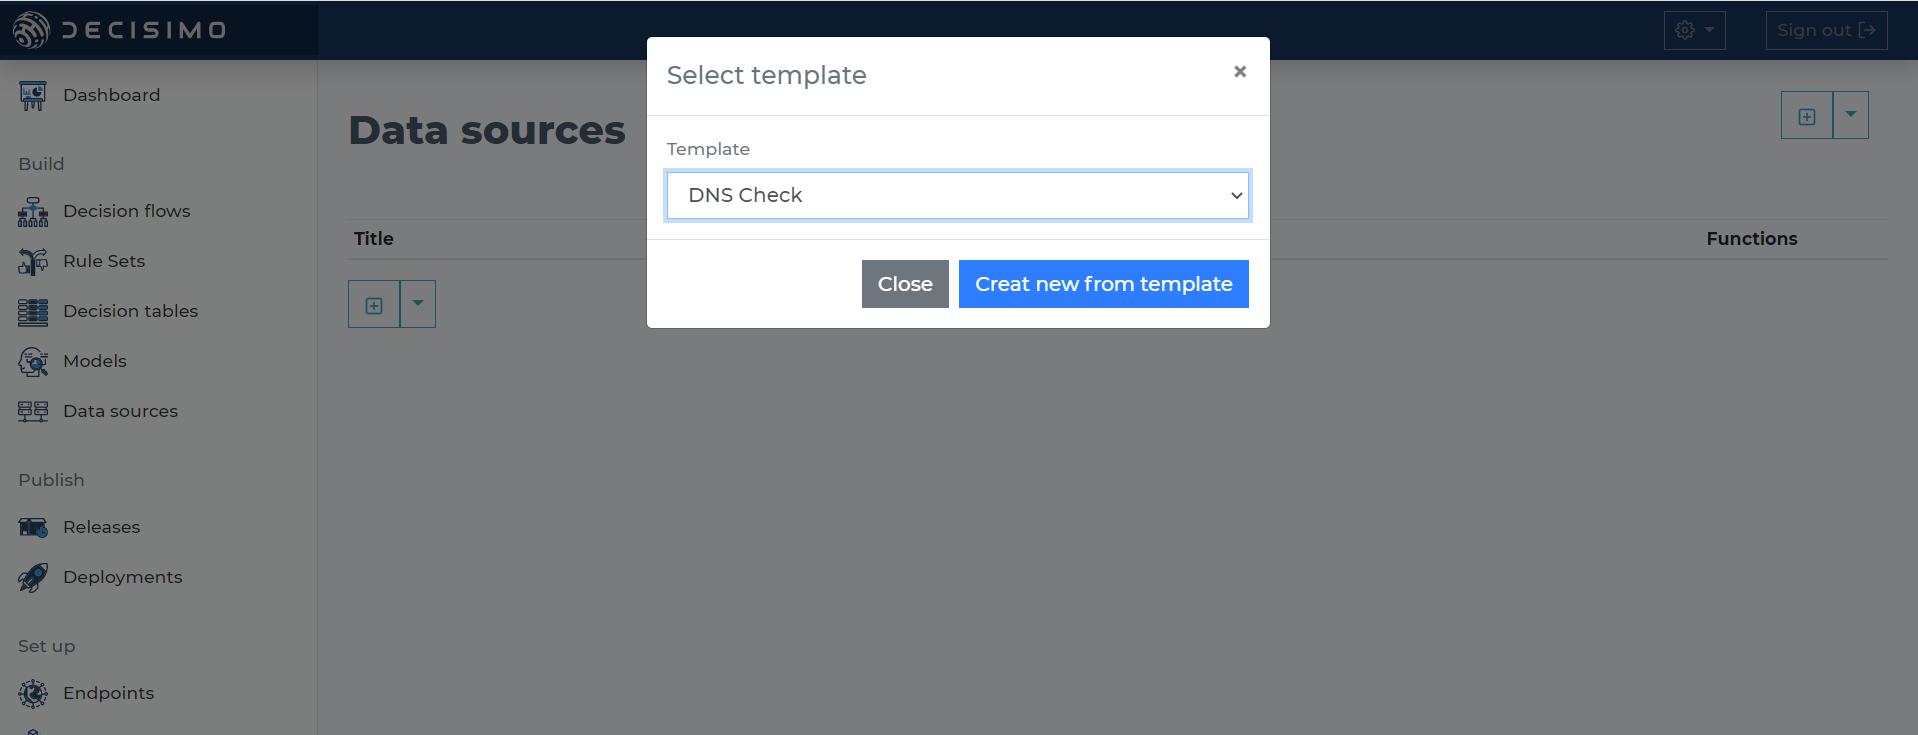
2. Create a data source
We can create a data source by filling in the configuration, or use the template that is already available.
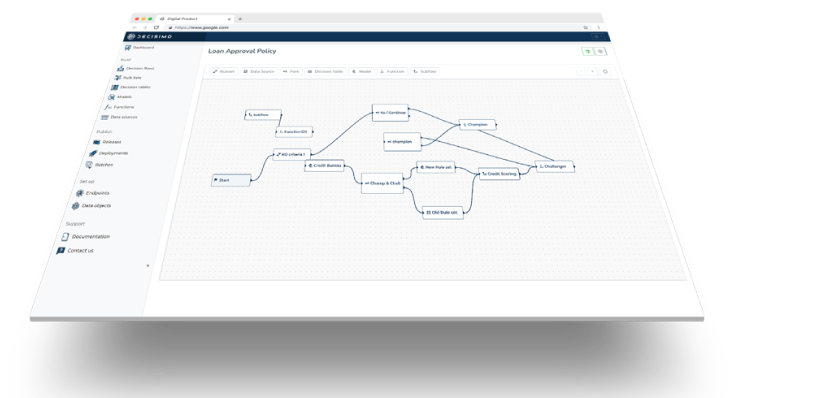
3. Create decision flow
In the new decision flow, add three steps: start, external data, and rule set. Then connect them in that order.
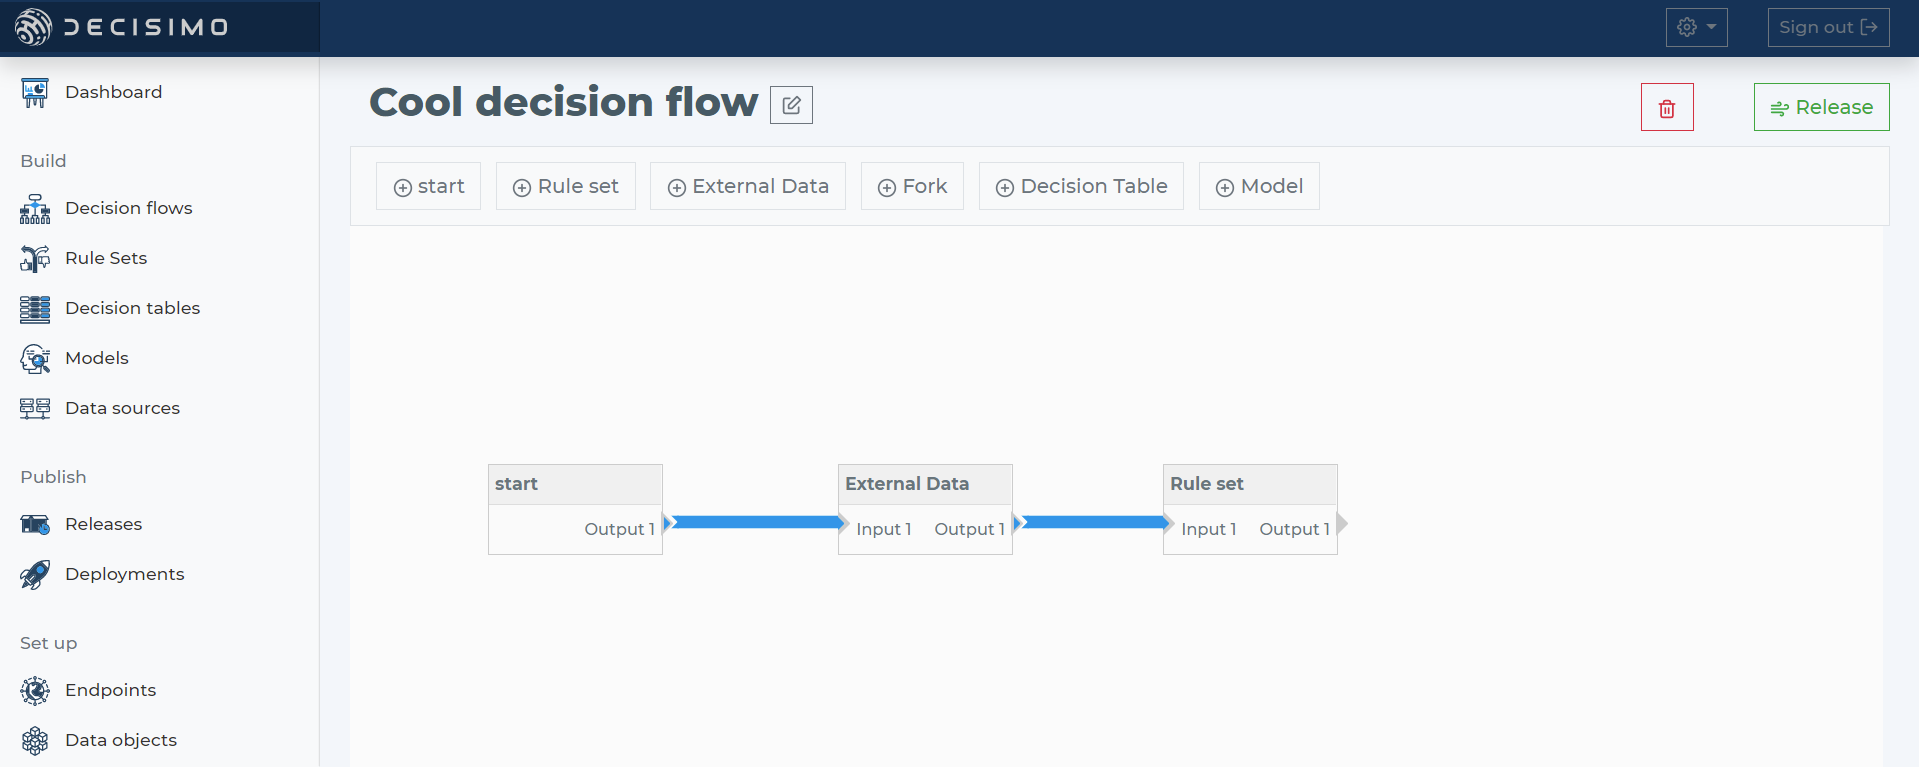
Start tells the engine where execution begins. External data is a step that calls the defined data sources in parallel through the step options. Rule set holds the selected rule set.
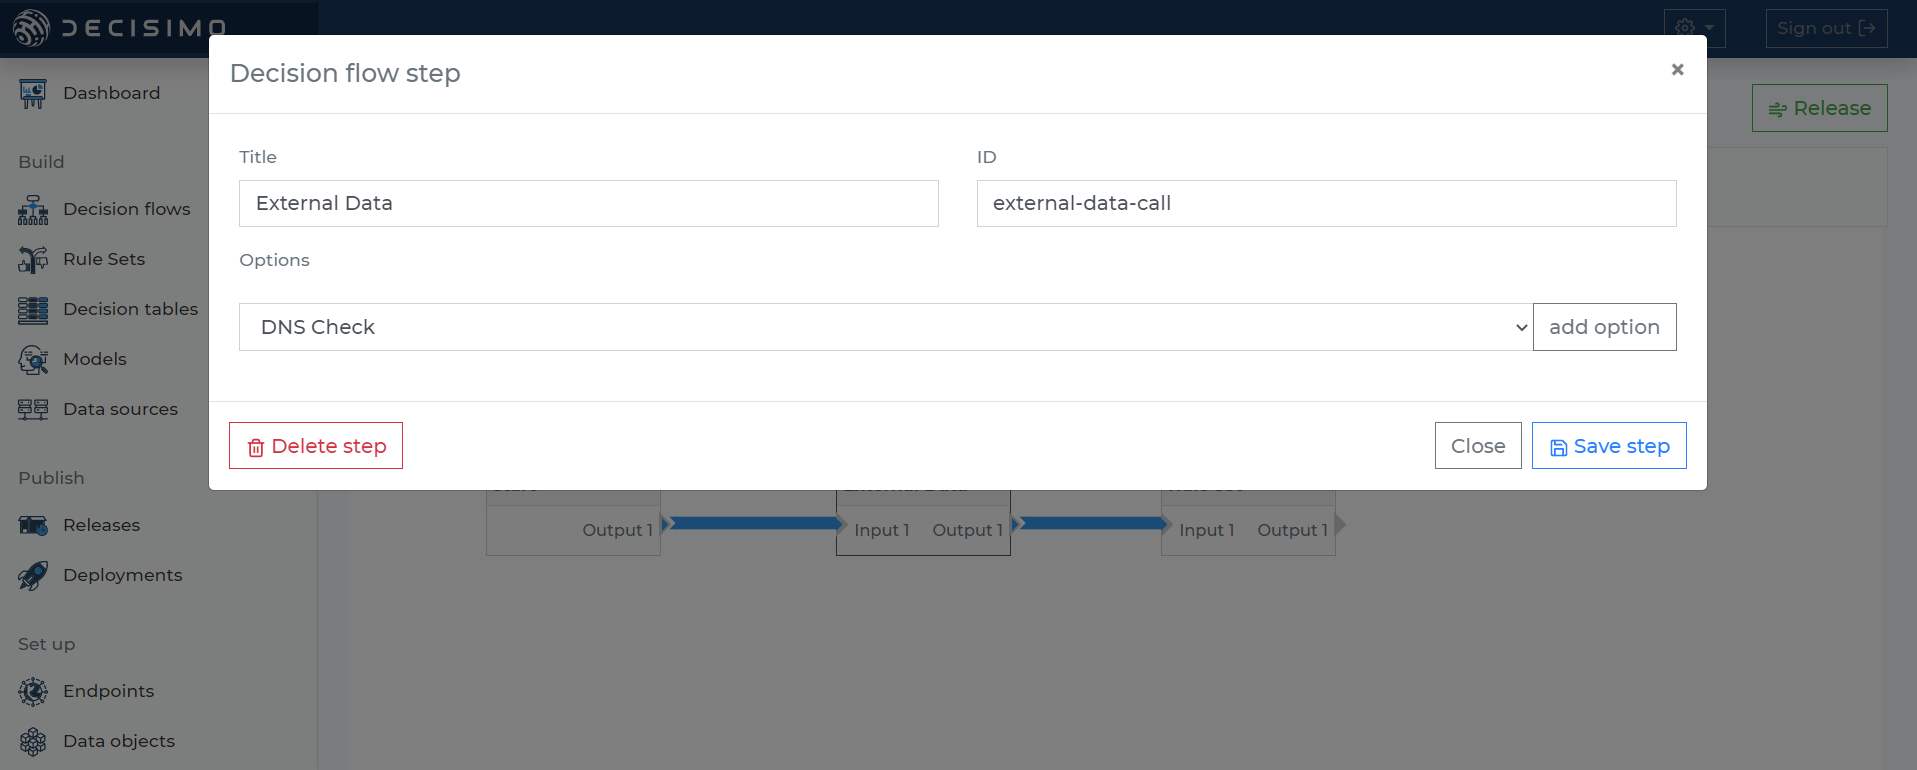
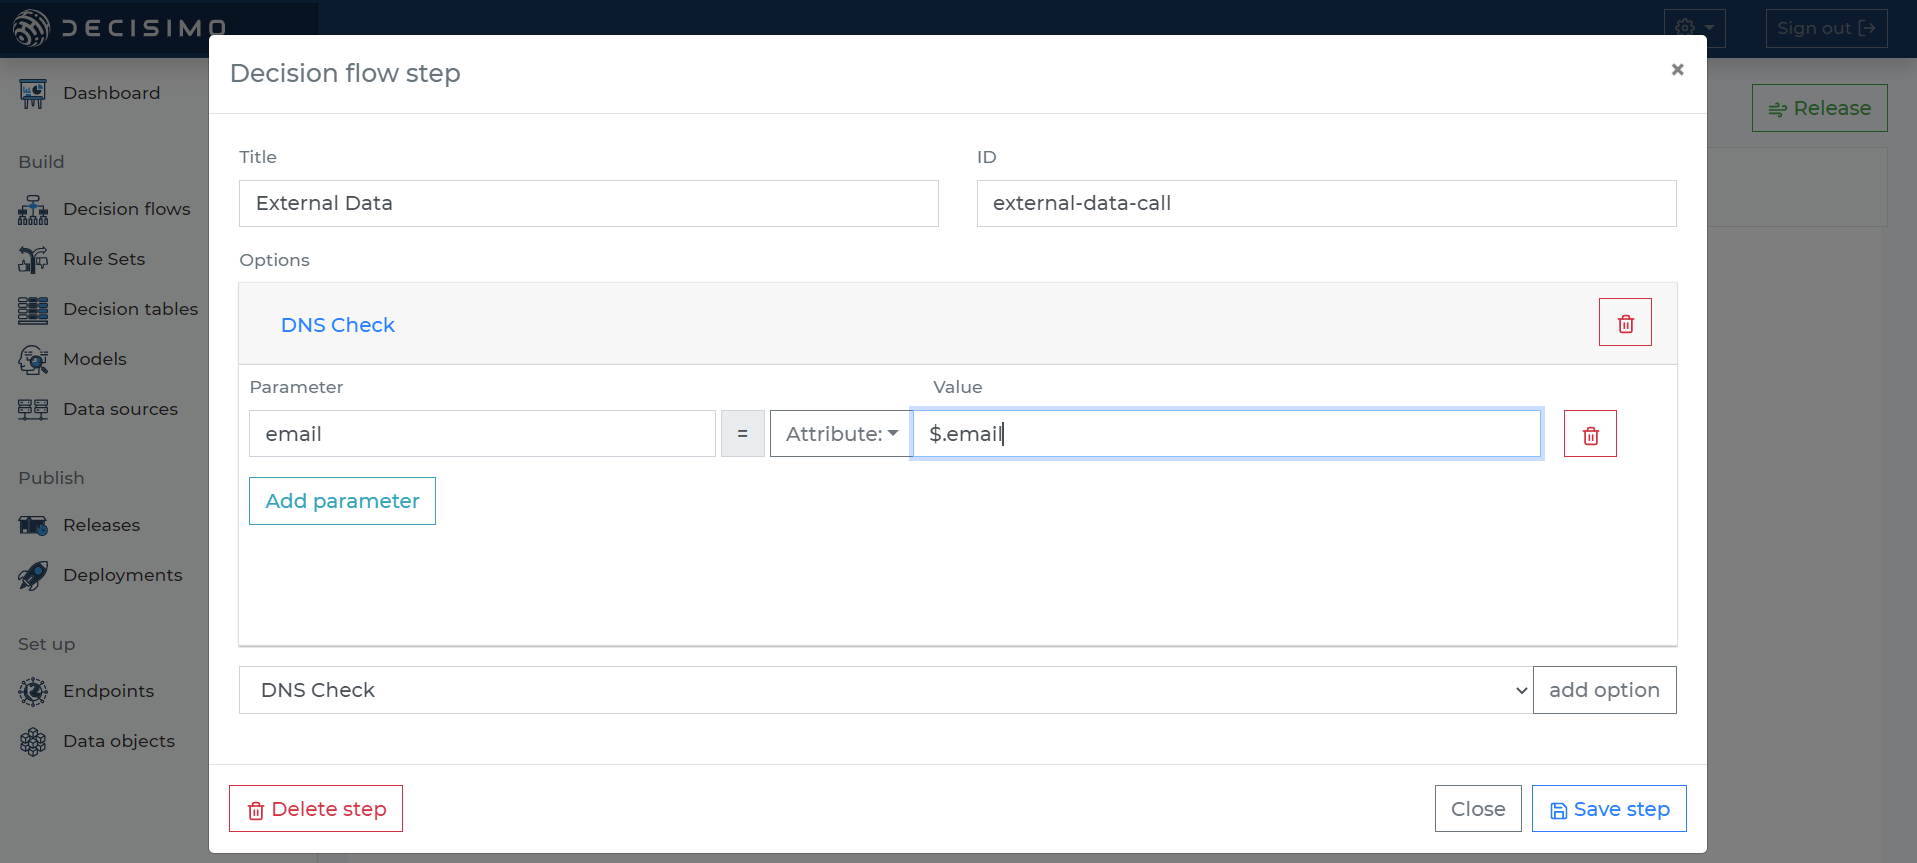
4. Defining external data step
Next, add an option for external data, which is the DNS check we just created. We know the check expects the parameter email to contain the email address. Define that parameter to use the value from the data object attribute $.email.
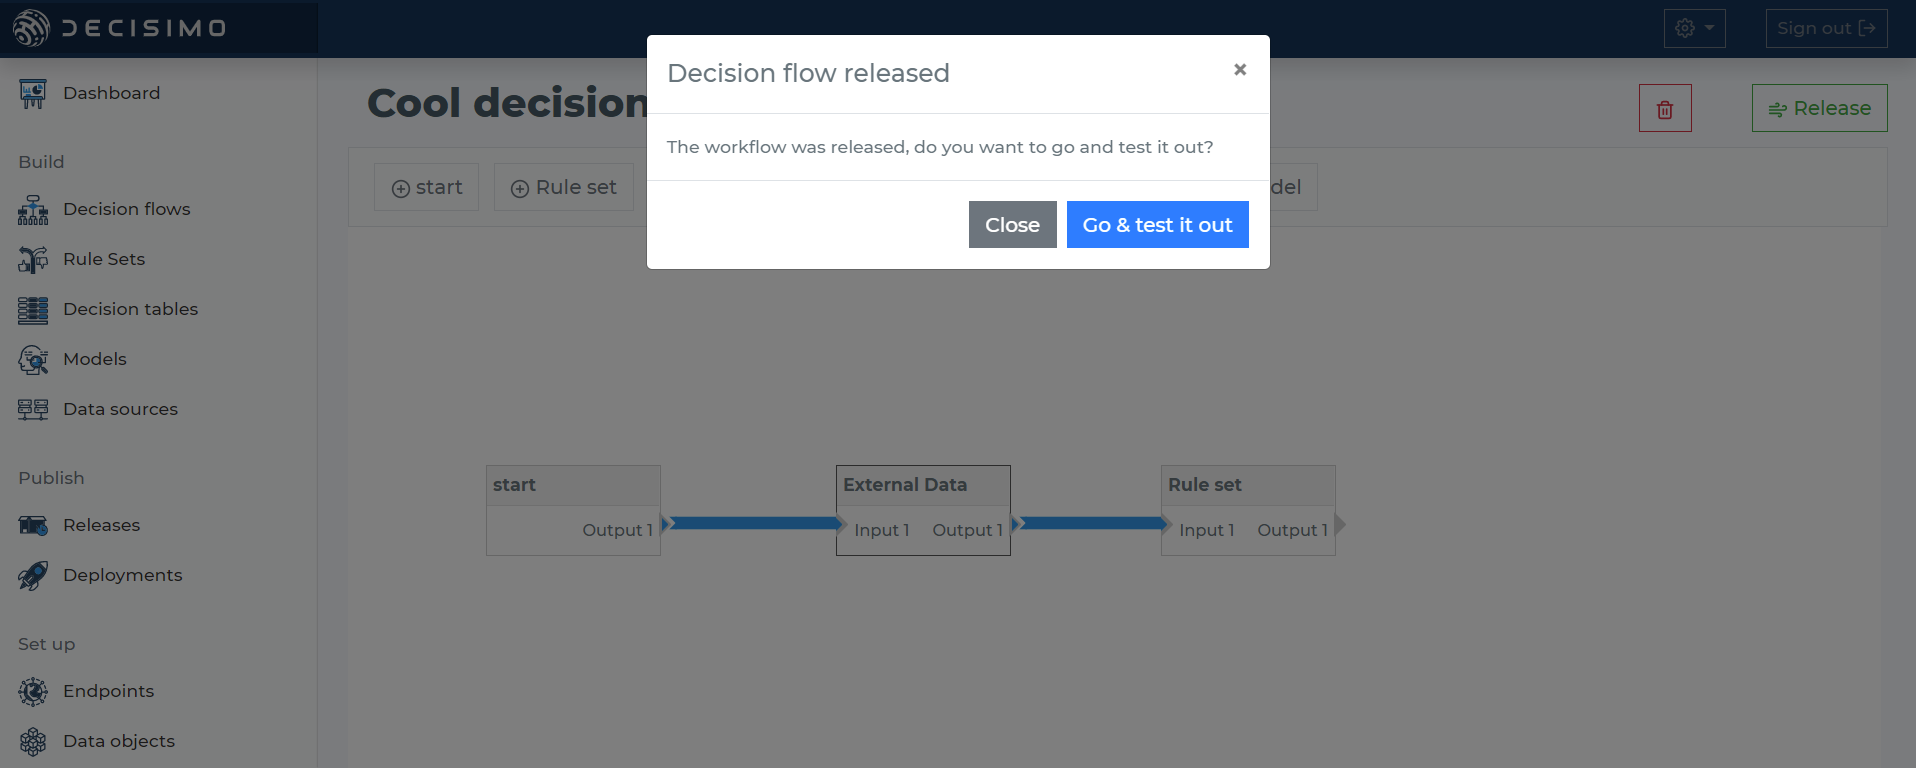
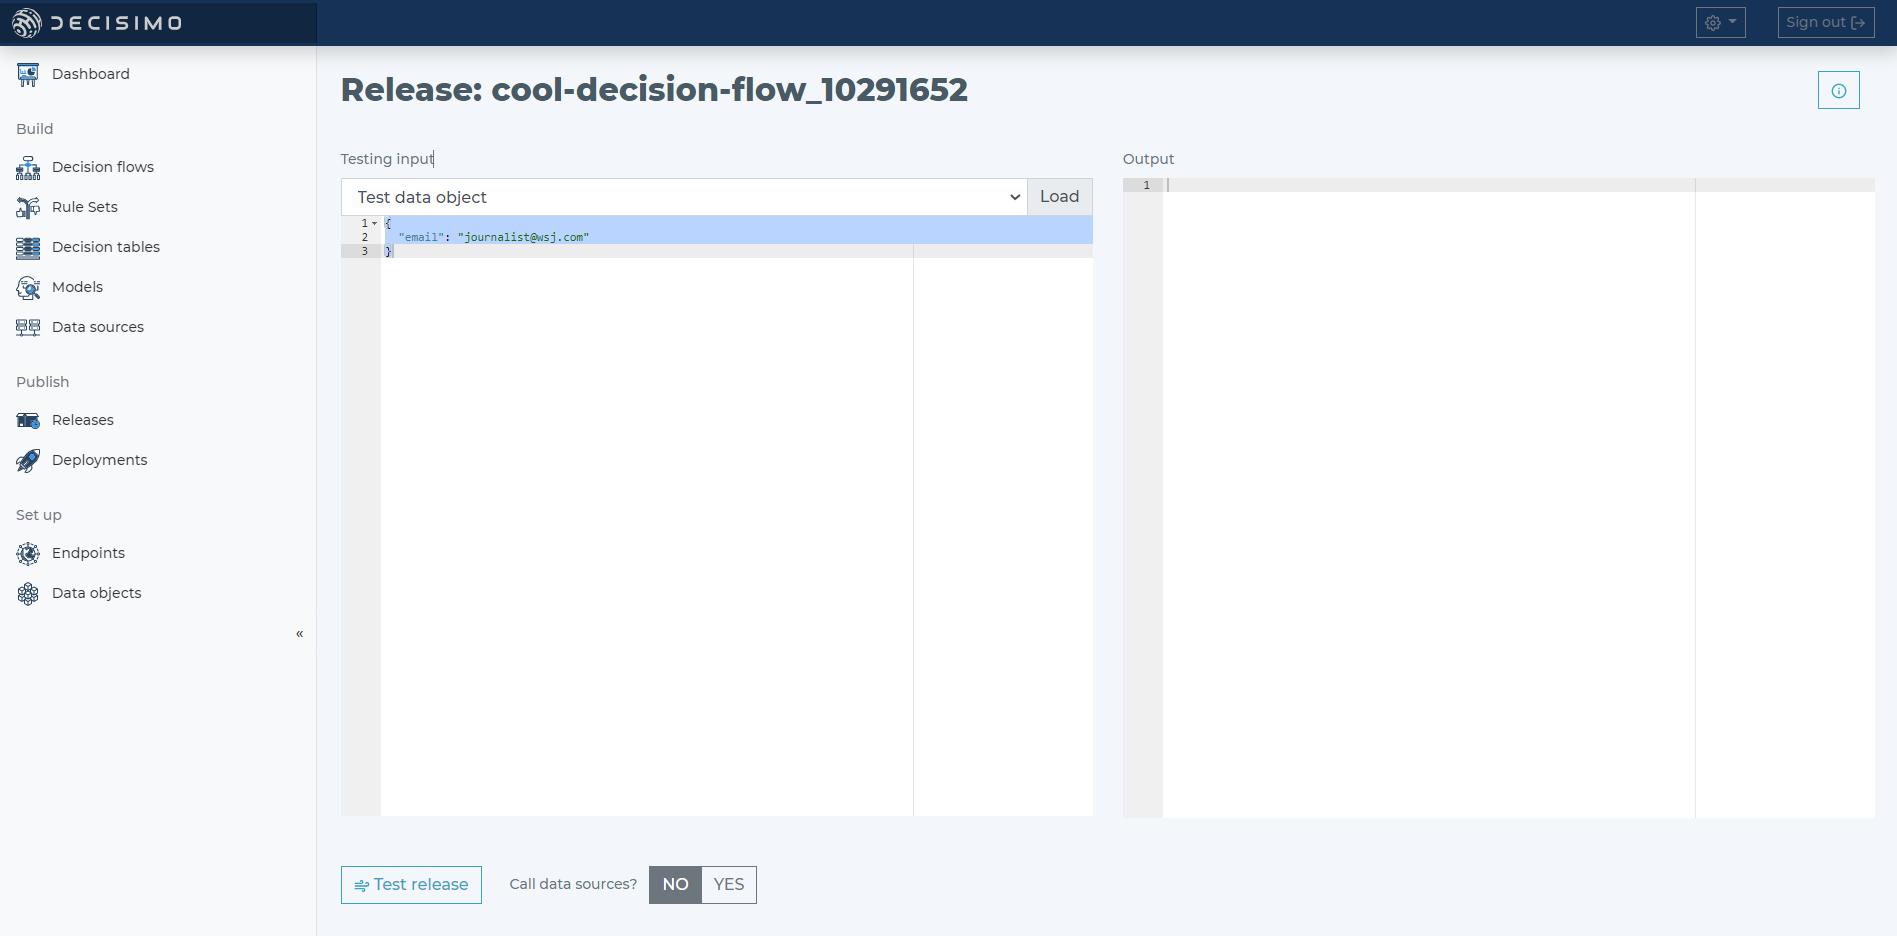
5. Intermediate release & test
Now we can release and test the decision flow. Release creates a snapshot of the current decision flow and all its parts. This lets us test how the current flow behaves during execution.
On the release page on the left, select our test data object from the drop-down list, click load, and a JSON object with our email attributes will appear below.
Once the data object is loaded, click the Test release button, wait a moment, and review the result of the mock run. When the test finishes, the right side shows the initial JSON enriched with data collected by the engine along the way.
In the result, we can see what the external data loaded from the DNS check. In the path output - check - dns-check - mx, there is an array of records found for the email address MX records.
If there are no records in mx, the domain does not receive emails. Sometimes there is one record, and sometimes there are 10.
We need to write JSONPath to get those MX details for our rule. I recommend copying the JSON response or result. If you are not comfortable writing JSONPath, you can use websites like: jsonpath.com.
6. Create rule
Now that we know what data to expect, we create a rule set to determine whether an email is Google-hosted or not.
In our rule, we will evaluate the content of $.output.check.dns-check.mx[0].target. Since Gmail users usually have several records, we will not match the value exactly. We will treat any target that ends with aspmx.l.google.com as Google-hosted.
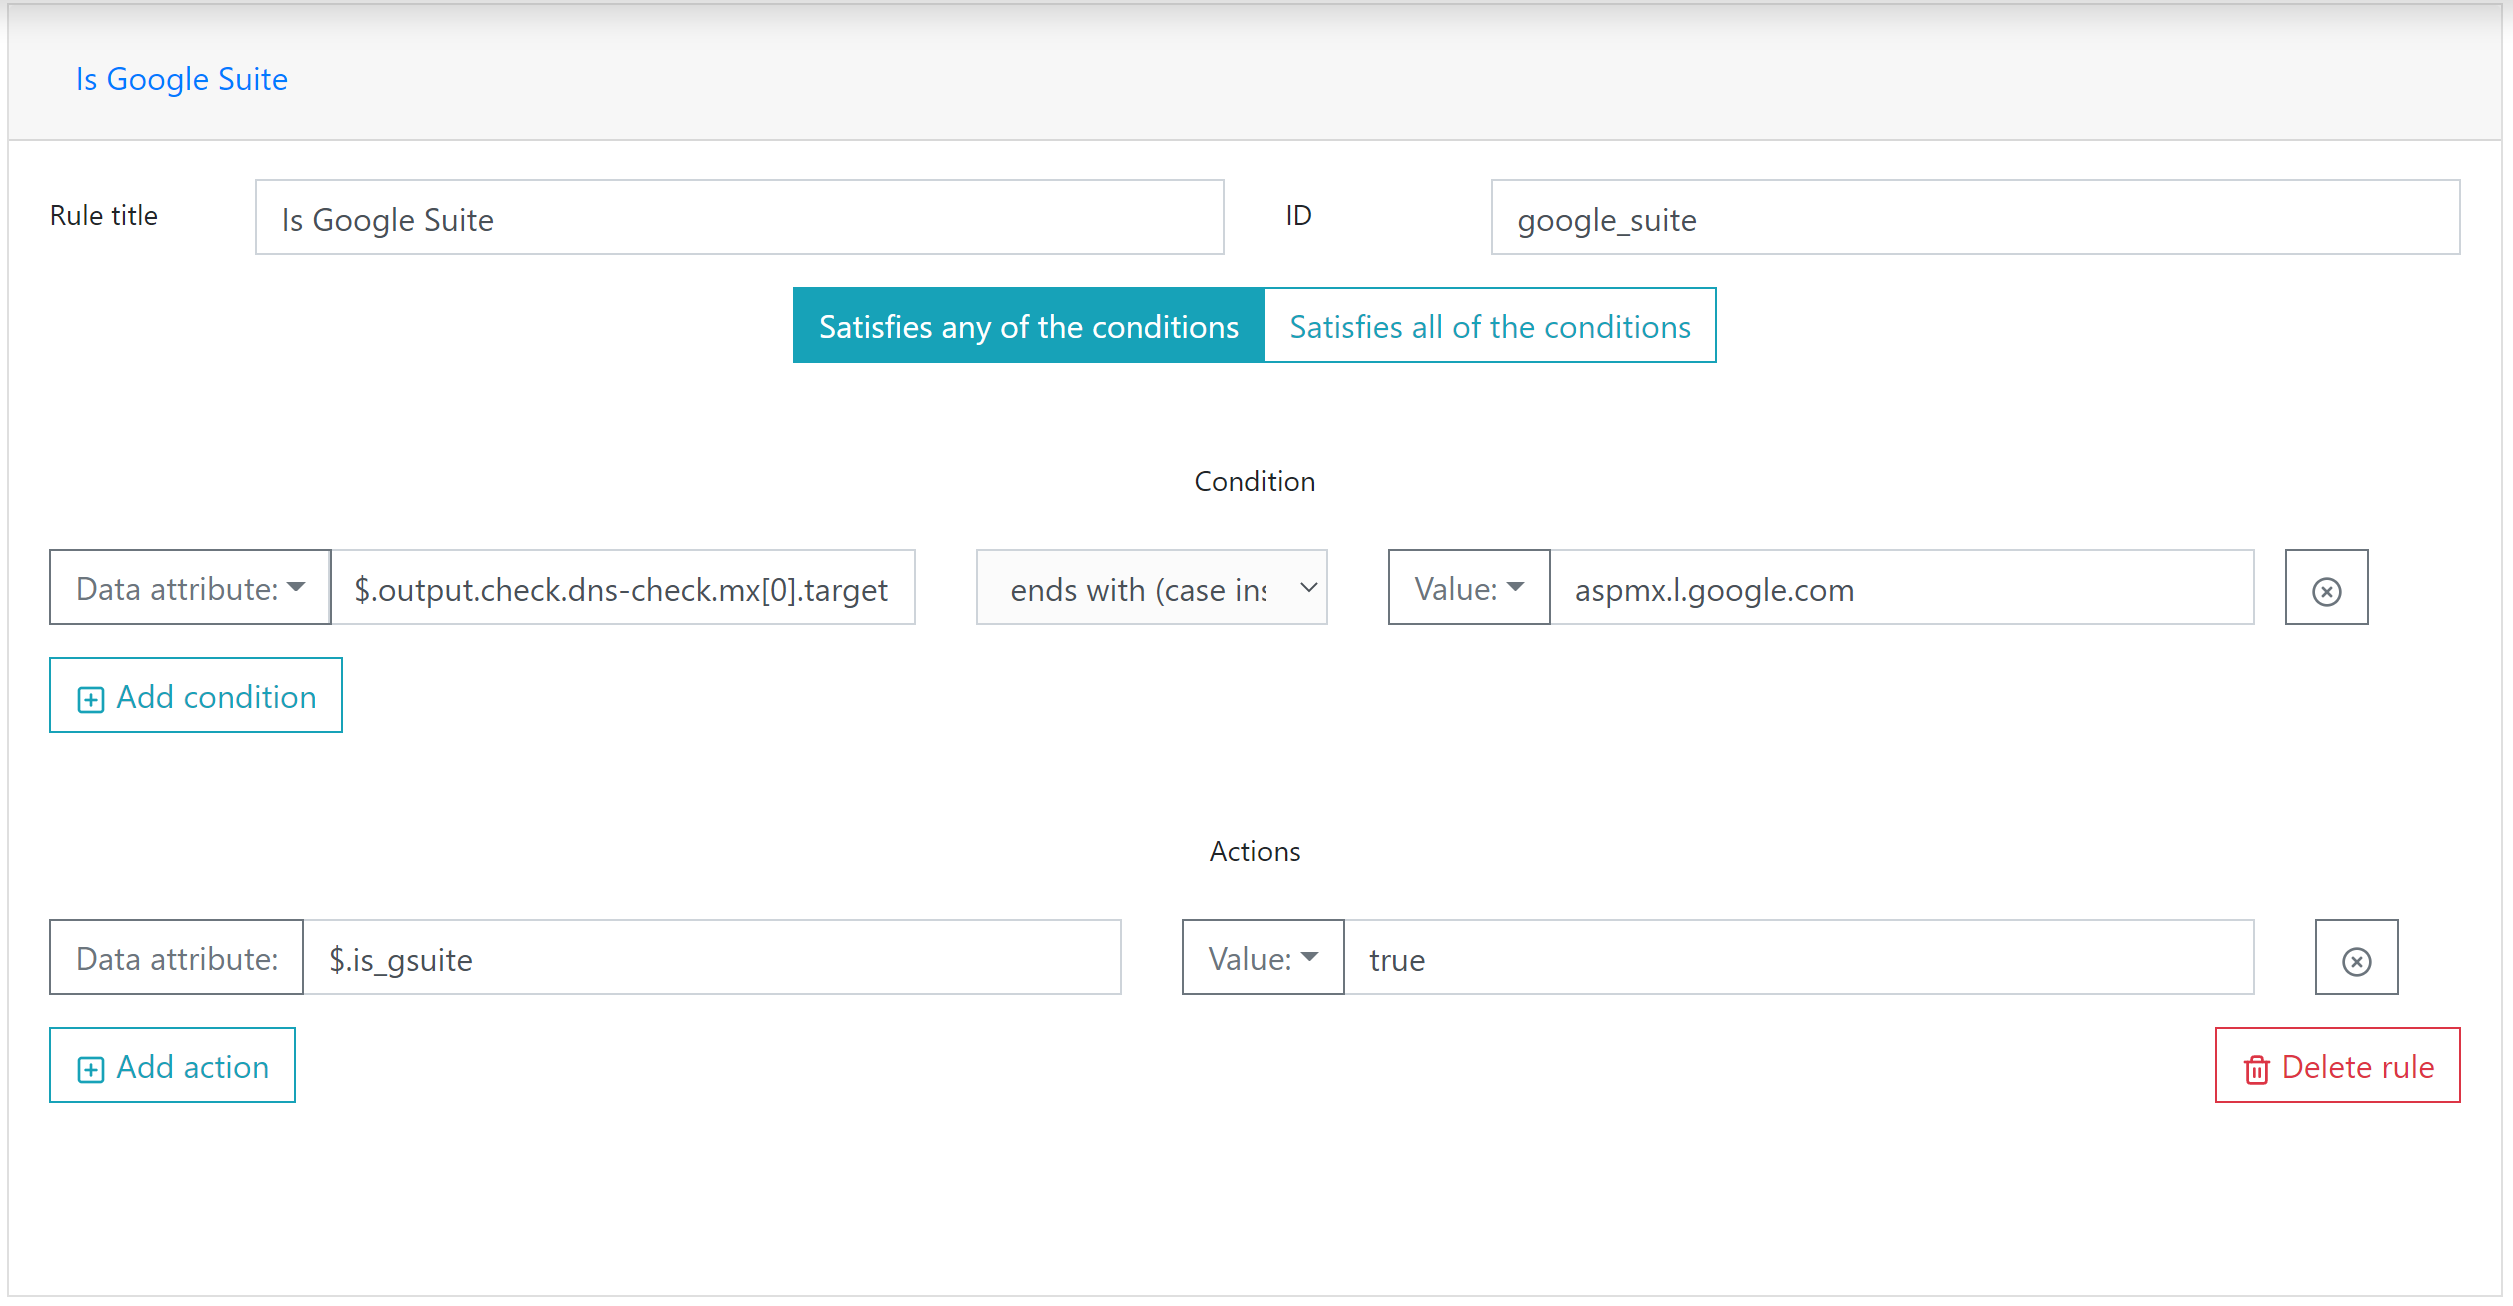
We will create two rules: one to detect Google hosting, and one to negate it, meaning not Google GSuite.
Once that is done, update the decision flow step for the rule set. Select our rule set in the step, save it, and test and release again.
7. Testing, Endpoint creation and deployment
Now we can verify whether it detects the address correctly. Ideally, wsj.com should be detected as “is google”. Anything else should return no.
If the testing works, we can set up an endpoint. Create your endpoint on an instance physically as close to your servers as possible. If you are in Europe, use a European instance. If you are in Asia, use an Asian one. A different region can add several hundred milliseconds to the response time.
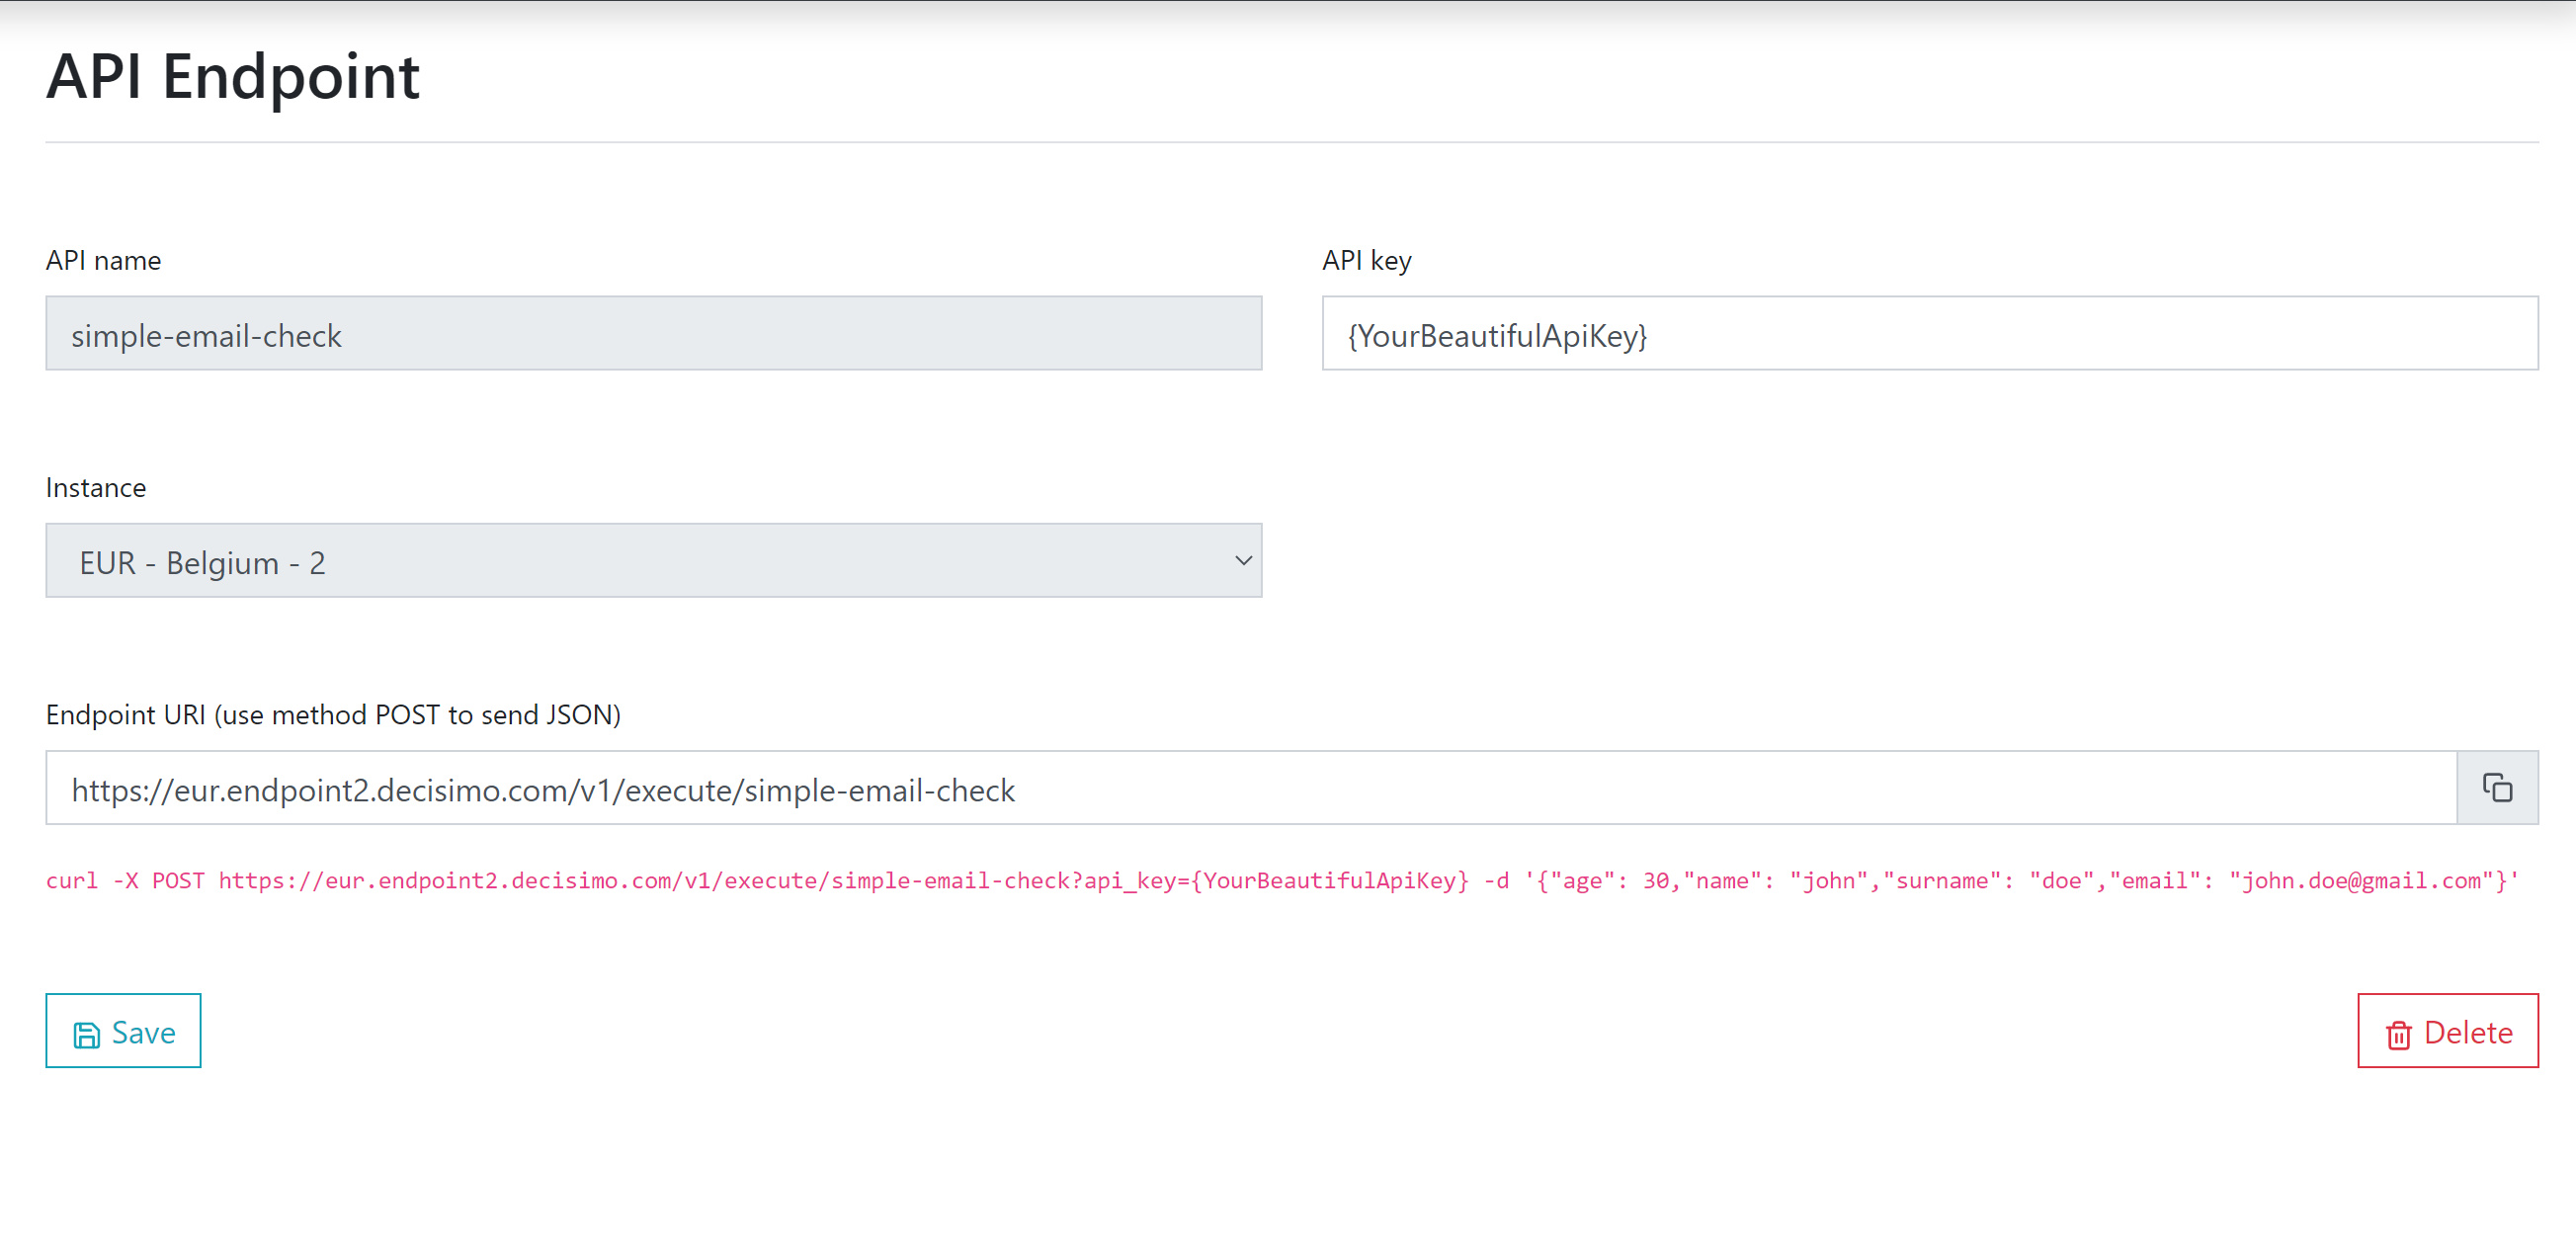
Once the endpoint is ready, go back to releases. Select the last release that worked for you. Test it again to confirm. If everything works, at the bottom of the page select your endpoint and click deploy. Once the info message shows that deployment is complete, you can start sending requests to the api endpoint, and it will run the decision flow you just tested.
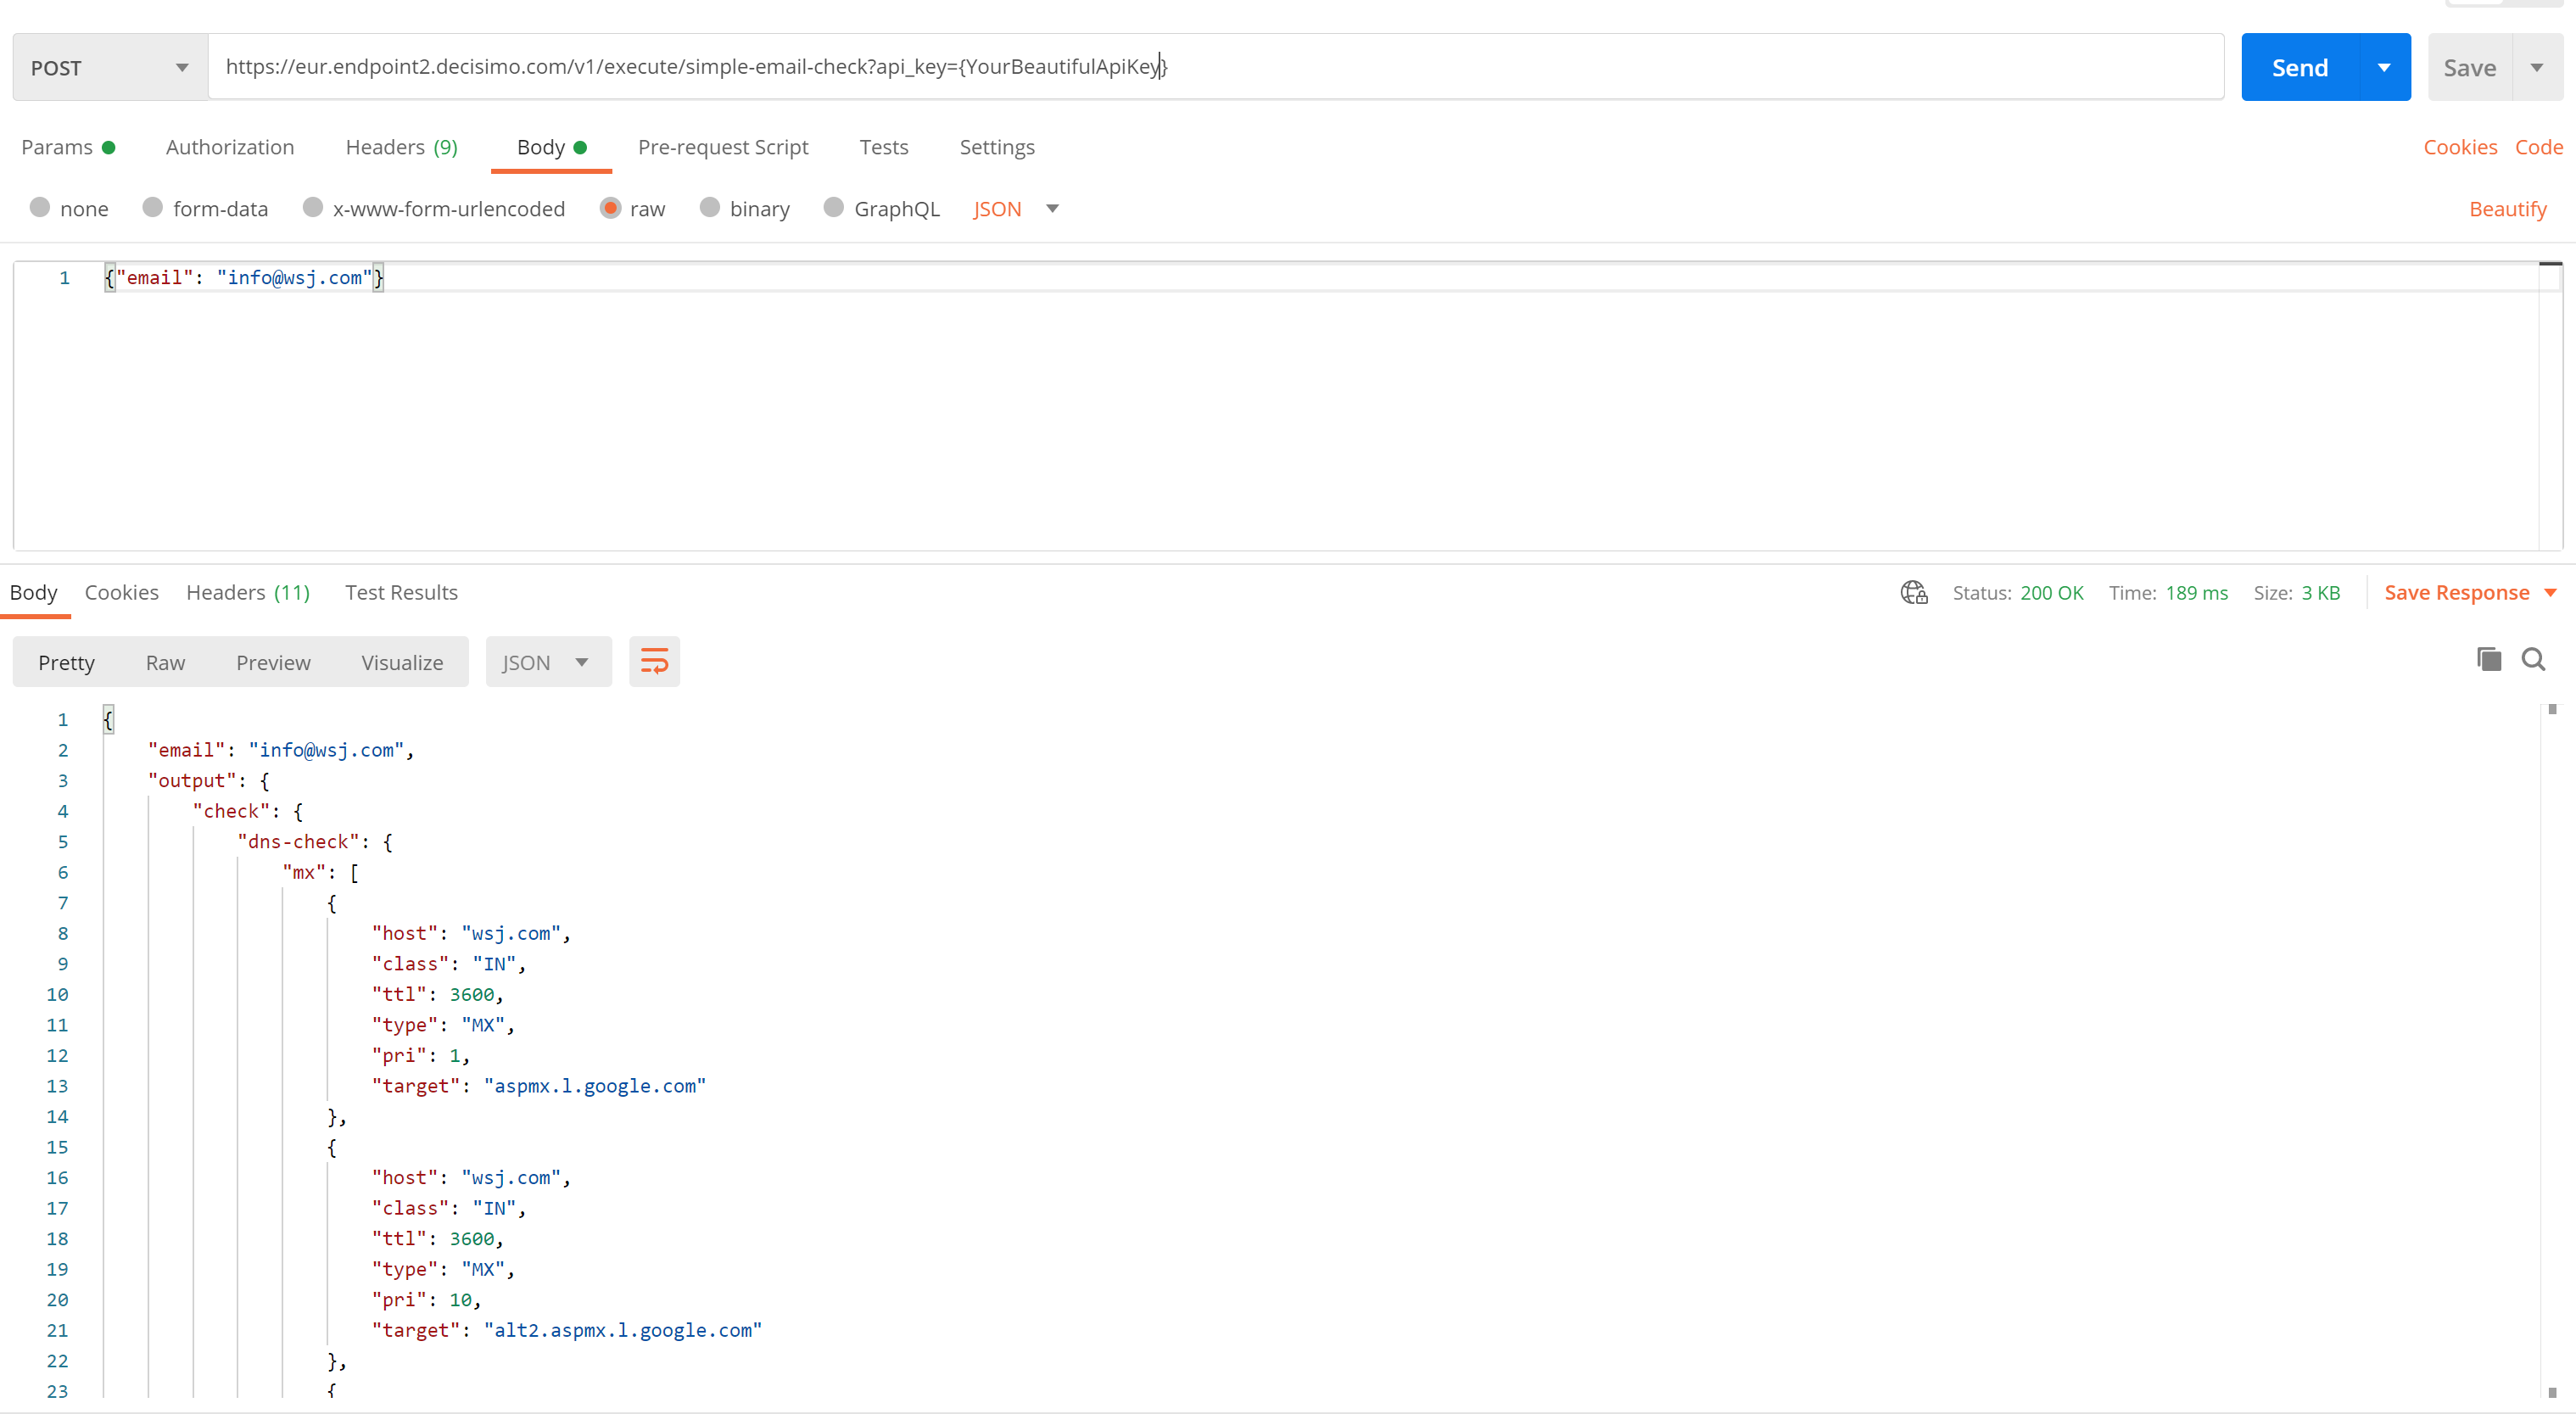
8. Test out your endpoint using postman
Copy the JSON from testing, copy the endpoint URL, open Postman, and start testing.
In Postman, select the POST method. Paste the endpoint URL into the request URL field. Click Body, select Raw, then on the right change text to JSON. Paste the JSON with the email below and click SEND.
If everything works, you should receive the same response as in the portal test.
9. Integrate into your system
If everything is running correctly, integrate the endpoint into your system and use it to update rules and deploy changes quickly. The endpoint stays the same. The rules in the decision flow can change whenever you need them to.
Happy decisioning!